Create a Kachaka Account
Before you can log in to the Kachaka app, you need a Kachaka account. This account is used to sign in to the app and operate every robot setting; it works the same for both Kachaka (home) and Kachaka Pro (commercial). This page covers the two ways to create an account and the final email-verification step.
Once your account is ready, sign in to the app with it, then install the app and check the system requirements before moving on to setup.
Option 1: Create an account by email
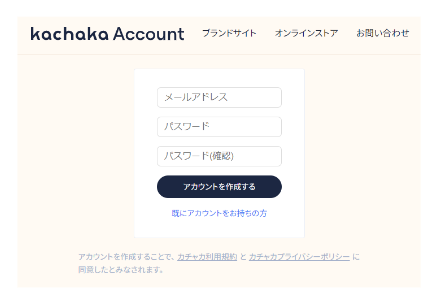
- Open a browser and go to the Kachaka account sign-up page: https://account.kachaka.life/user/entry
- Enter your “Email” and a “Password” (at least 6 characters).
- Select “Create account”.
- Check your inbox for the verification email:
- Subject: [Kachaka account email verification]
- Sender domain:
@account.kachaka.life
- Open the email and click the verification link inside.
- When the page shows “Email verified”, your account is ready.
Option 2: Create an account with social login (Apple/Google)
If you prefer to sign in with an Apple ID or Google account, you can create your Kachaka account directly with social login:
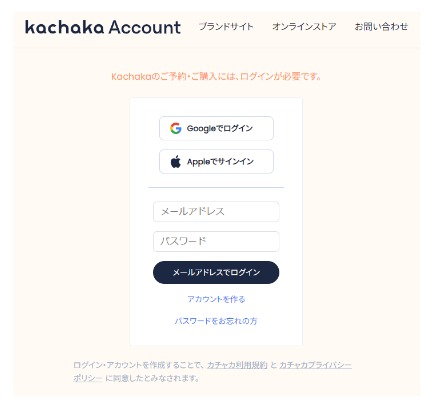
- Go to the Kachaka account login page: https://account.kachaka.life/user/login
- Select the social login icon you want to use:
- Apple icon: sign in with Apple ID
- Google icon: sign in with your Google account
- Enter that account’s credentials and complete the login.
- Check your inbox for an email with the subject [Kachaka account email verification] from the
@account.kachaka.lifedomain. - Open the email and click the verification link inside.
- When the page shows “Email verified”, your account is ready.
If the verification email doesn’t arrive
The verification email usually arrives quickly. If it doesn’t, check your spam folder first, add @account.kachaka.life to your safe-sender list, and try again. If that still doesn’t help, see Login troubleshooting (verification email and Apple ID) for detailed steps.
Screens