Adding, Repositioning and Setting Default Destinations
Once your map is built, the next step is to register destinations — the fixed spots Kachaka delivers furniture to, such as the living room, the kitchen, or a nurses’ station. After registering them, you can set the delivery target by App or by voice. This page covers three things: adding a destination, repositioning an existing one (including its facing direction), and setting a default destination.
No map yet? Start with Creating a New Map.
Adding a Destination
There are two ways to add a destination — pick whichever fits your need:
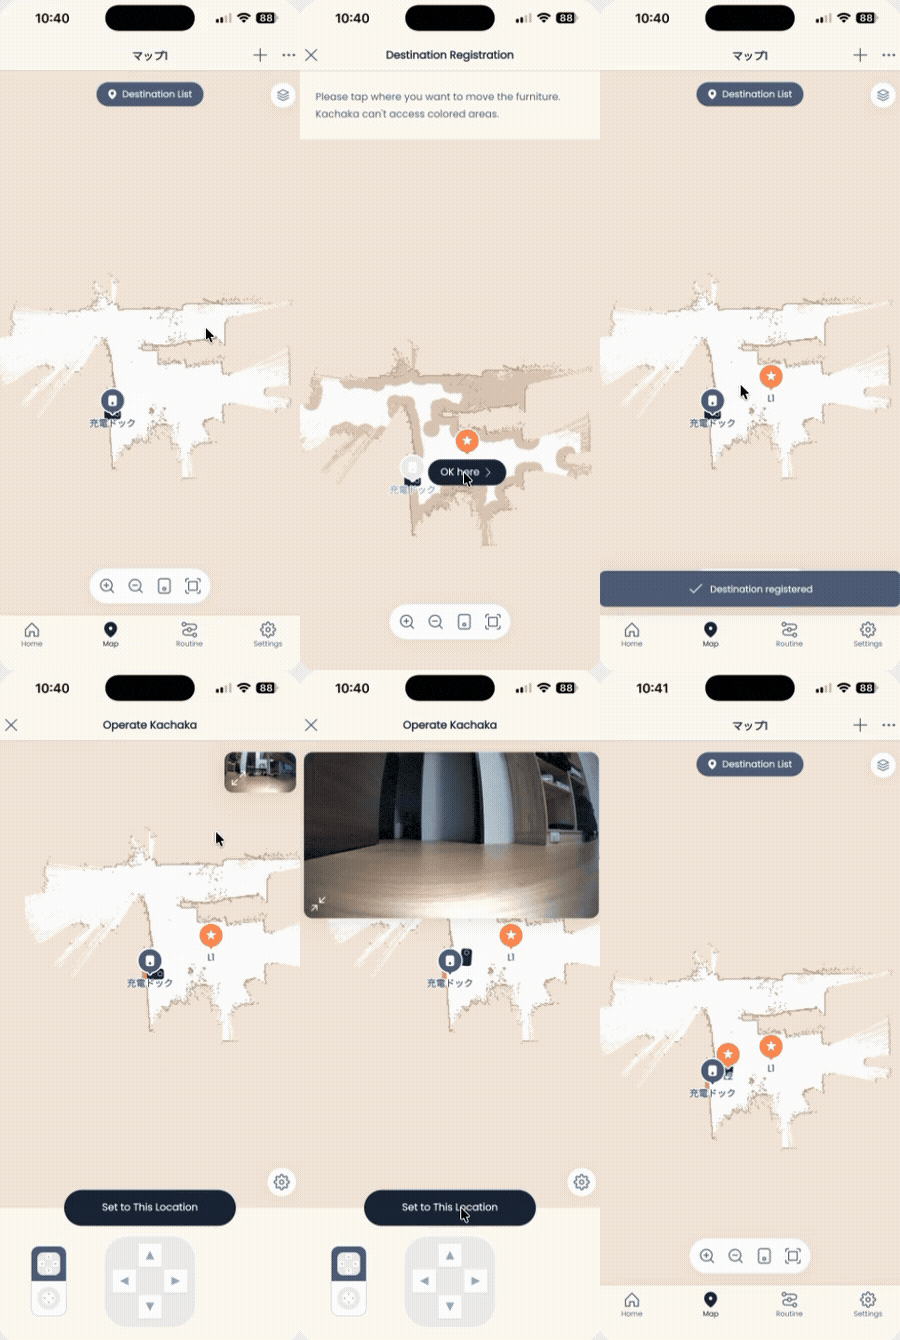
- Tap a spot on the map: tap the location directly on the map view. This is the fastest method and is fine when approximate placement is enough.
- Drive Kachaka to the spot: use the D-pad to drive Kachaka to the real location, then register it. You confirm the actual position as you go, so this gives the most accurate placement.
Method 1: Tap a Spot on the Map
- Open the Map tab.
- Tap + in the top right.
- Tap Add destination.
- Tap Specify location on map.
- Tap the spot on the map where you want furniture placed.
- Confirm the position and tap Set here.
- Rotate the arrow to set the direction Kachaka faces when it sets the furniture down, then tap OK.
- Choose a destination name from the list and tap OK in the top right.
Method 2: Drive Kachaka to the Spot
- Open the Map tab.
- Tap + in the top right.
- Tap Add destination.
- Tap Drive Kachaka to specify location.
- Use the D-pad to drive Kachaka to the destination. The front of the robot becomes the front-facing direction of the furniture, so set the orientation at the same time. If the D-pad is hard to line up, see Manual Remote Control.
- When Kachaka reaches the spot, tap Set to this position.
- Choose a destination name from the list and tap OK in the top right.
To target a destination by voice (saying its name to send furniture there), the destination name must be chosen from the built-in list — freely typed names cannot be called by voice. For which names are allowed, see the Voice-Compatible Destination Name List.
Repositioning a Destination (and Its Facing Direction)
If you rearrange where furniture sits, you can reassign an existing destination’s position. As before, there are two methods — tap on the map, or drive Kachaka.
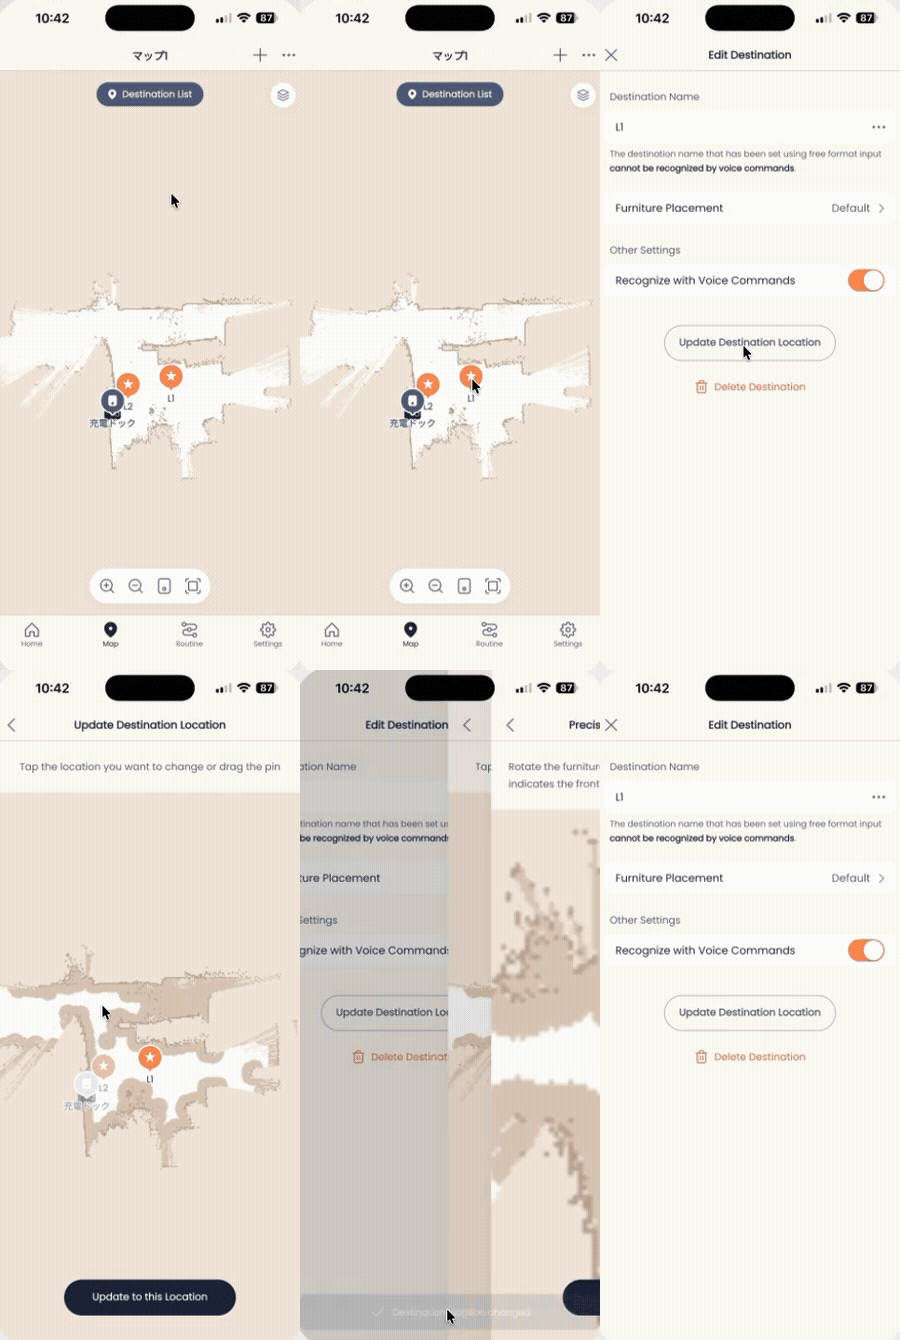
Tap a Spot on the Map
- Open the Map tab.
- Tap Destination list at the top of the screen.
- From the list, tap the destination you want to change (for example, “Home”).
- Tap Edit destination.
- In the edit screen, tap Change destination position.
- For the edit method, choose Specify location on map.
- Tap the new spot on the map. To zoom in, pinch out (place two fingers on the screen and spread them apart).
- Once the destination pin appears, tap Change to this position.
- Drag the arrow icon to rotate it so it points the way the furniture should face when placed at the destination.
- To fine-tune the position, tap the cross-arrow icon at the bottom right to switch to move mode, then drag to adjust the furniture’s position.
- Once the direction and position look right, tap OK.
Drive Kachaka to the Spot
Steps 1-5 are the same as above (open the Map tab → Destination list → select the destination → Edit destination → Change destination position).
- For the edit method, choose Drive Kachaka to specify location.
- Use the controller to drive Kachaka to the new spot, then tap Change to this position.
Setting a Default Destination
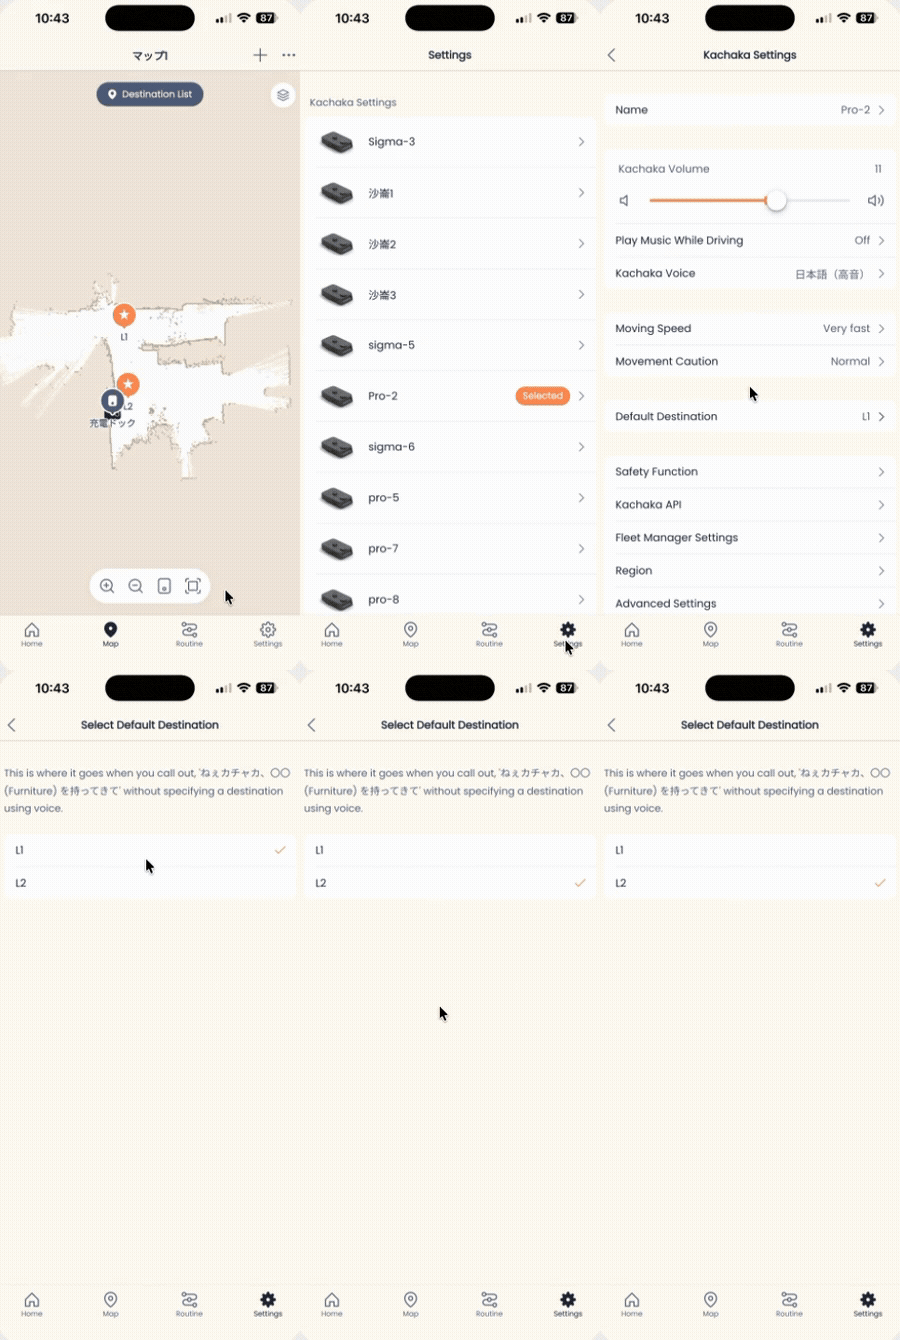
Once you mark a spot as the default destination, you no longer have to name a target every time — just say “bring me X” (without specifying where), and Kachaka automatically delivers it to that fixed spot. This is especially handy when you go back and forth to the same place every day (for example, always returning something to one room).
- Open the Settings tab.
- Tap the Kachaka you want to configure.
- Tap Default destination in the center.
- Choose one of your registered destinations as the default.
After this, pairing it with a shortcut lets you skip the target-naming step entirely. To run through a complete furniture delivery, see Moving Furniture: Basics.
Screens