
Creating a New Map
Kachaka uses a map to recognize its surroundings and plan routes. You should build a new map when you move it to a new space, or when furniture has been rearranged enough that its layout has changed and Kachaka starts moving unreliably.
Kachaka can save multiple maps and switch between them at any time, so a new map never overwrites the old one — keep a separate map for each location or temporary layout.
Map quality directly determines how reliably Kachaka drives and stops later on. Before you start, read Map Prep and Accuracy Tips: clearing the floor, opening doors, and keeping the area bright will greatly reduce future position drift.
Create a brand-new map
-
Open the Map tab in the app.
-
Tap the + in the top-right corner.
-
Tap Add map.
-
Name the new map, then tap Create.
-
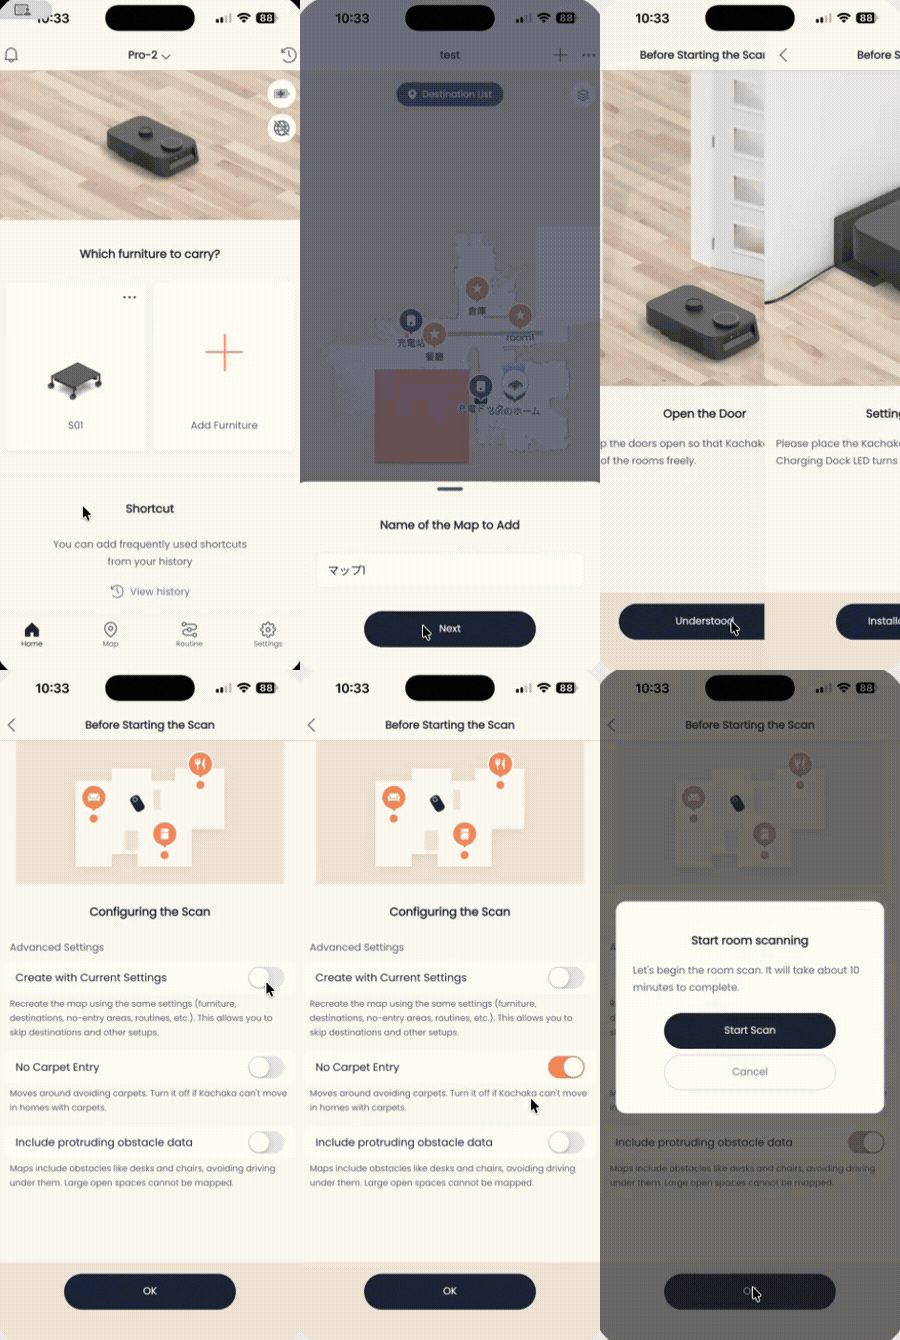
Follow the on-screen prompts and tap Start scan. Kachaka will drive around and scan the environment.
-
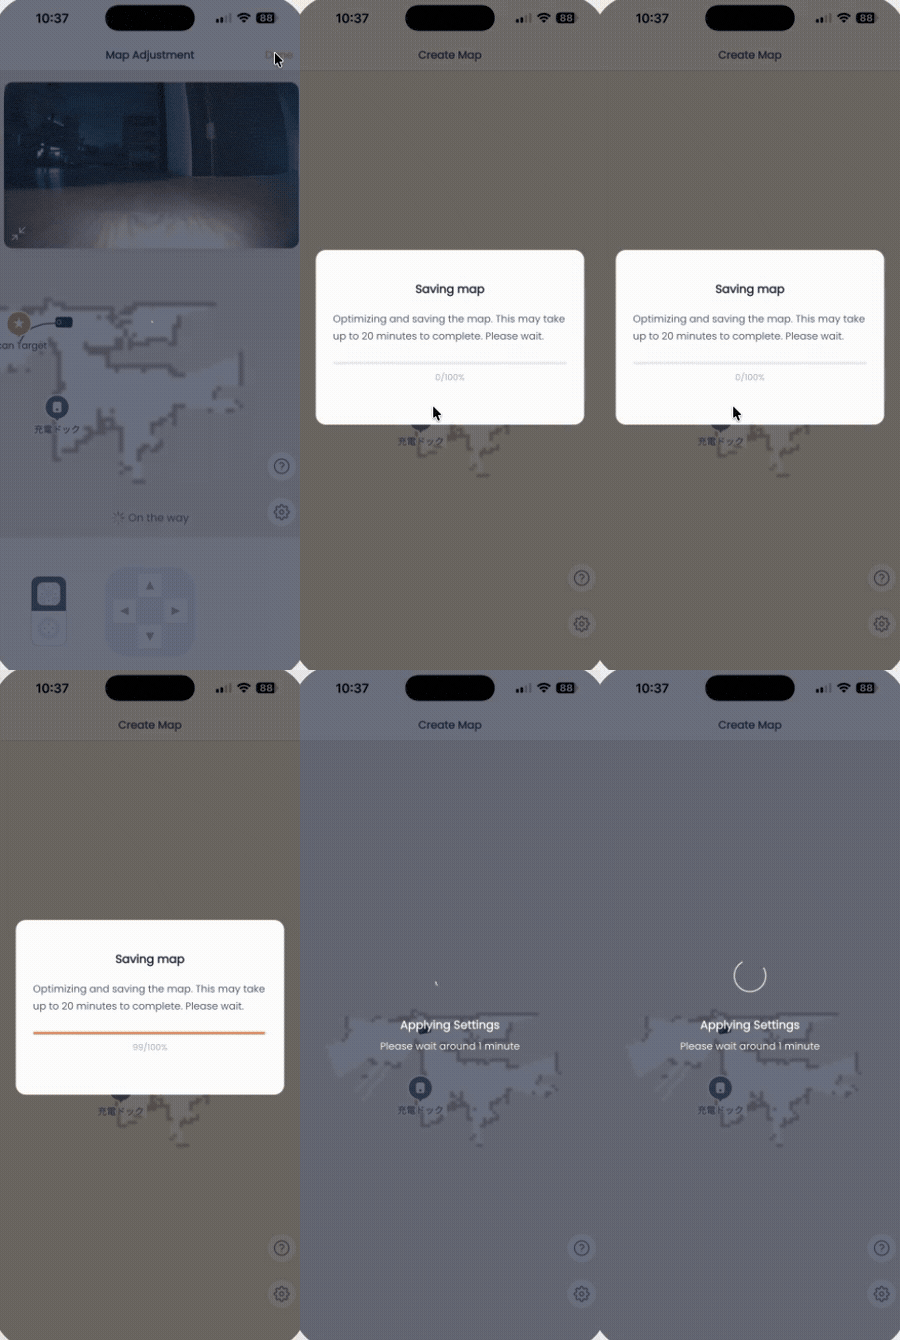
When scanning finishes, Kachaka announces that the automatic scan is complete.
-
Tap Save this map.
- If the map is not fully scanned, tap Adjust manually instead to fill in or fine-tune the missing areas.
-
After Kachaka announces that map creation is complete, tap OK to finish.
Once done, go to Adding, Repositioning and Setting Default Destinations to register the destinations on your new map before you start assigning deliveries.
Rebuild the map while keeping your settings
If the layout changed a lot and Kachaka has become unstable, you can rebuild the map without losing everything by using the keep-settings option: furniture info, destinations, and routines (shortcuts and scheduled deliveries) are carried over, and the result is added as a brand-new map rather than overwriting the original.
Important: This mode cannot place destinations back at their exact original positions. After the new map is built, be sure to re-adjust each destination’s position one by one, or Kachaka may stop in the wrong place.
Newer app version
- First confirm that the map currently selected is the one whose settings you want to carry over.
- Open the Map tab and tap + in the top-right to add a map.
- Name the new map and tap Next.
- Tap Skip in the top-right.
- Turn the Create with current settings toggle on.
- Tap OK at the bottom of the screen.
- Tap Start scan and complete the map as described above.
Older app version
- First confirm that the map currently selected is the one whose settings you want to carry over.
- Open the Map tab, name the new map, then tap Create with current settings.
- Turn Include the scanned map off.
- If you want to merge a new area into the original map (instead of building a separate one), turn this on instead. That is the Extend an existing map feature, which widens the map rather than editing the original.
- Tap Next, then OK.
- Tap Start scan and complete the map as described above.
Screens
Related
- Map Prep and Accuracy Tips
- Adding, Repositioning and Setting Default Destinations
- Extending an Existing Map (Kachaka Pro)
- Fixing Position Drift and Getting Lost
Auto-mapping stops with a yellow LED?
If auto-mapping stops partway and Kachaka turns yellow and halts, a common cause is a floor that is too dark: the cliff (fall-prevention) sensor on the underside misreads the dark floor as a drop-off and stops. Use either workaround:
- Switch to manual mapping mode, which disables the cliff sensor so you can keep mapping.
- Before starting, cover the cliff sensor on the underside of the unit with a small piece of tape, then start auto-mapping.
After mapping is done, be sure to remove the tape and restore the cliff sensor to keep normal fall protection.