Setting Speed Zones (Kachaka Pro)
Speed zones are a Kachaka Pro-only feature. When you generally want Kachaka to travel at a faster speed but need it to slow down in specific areas — busy walkways, tight corners, or spots that need extra care — you can outline that area on the map and assign it its own driving speed. Whenever Kachaka enters the outlined area it automatically switches to the speed you set, then returns to its normal speed once it leaves.
You can define multiple speed zones on a single map, and each zone operates independently.
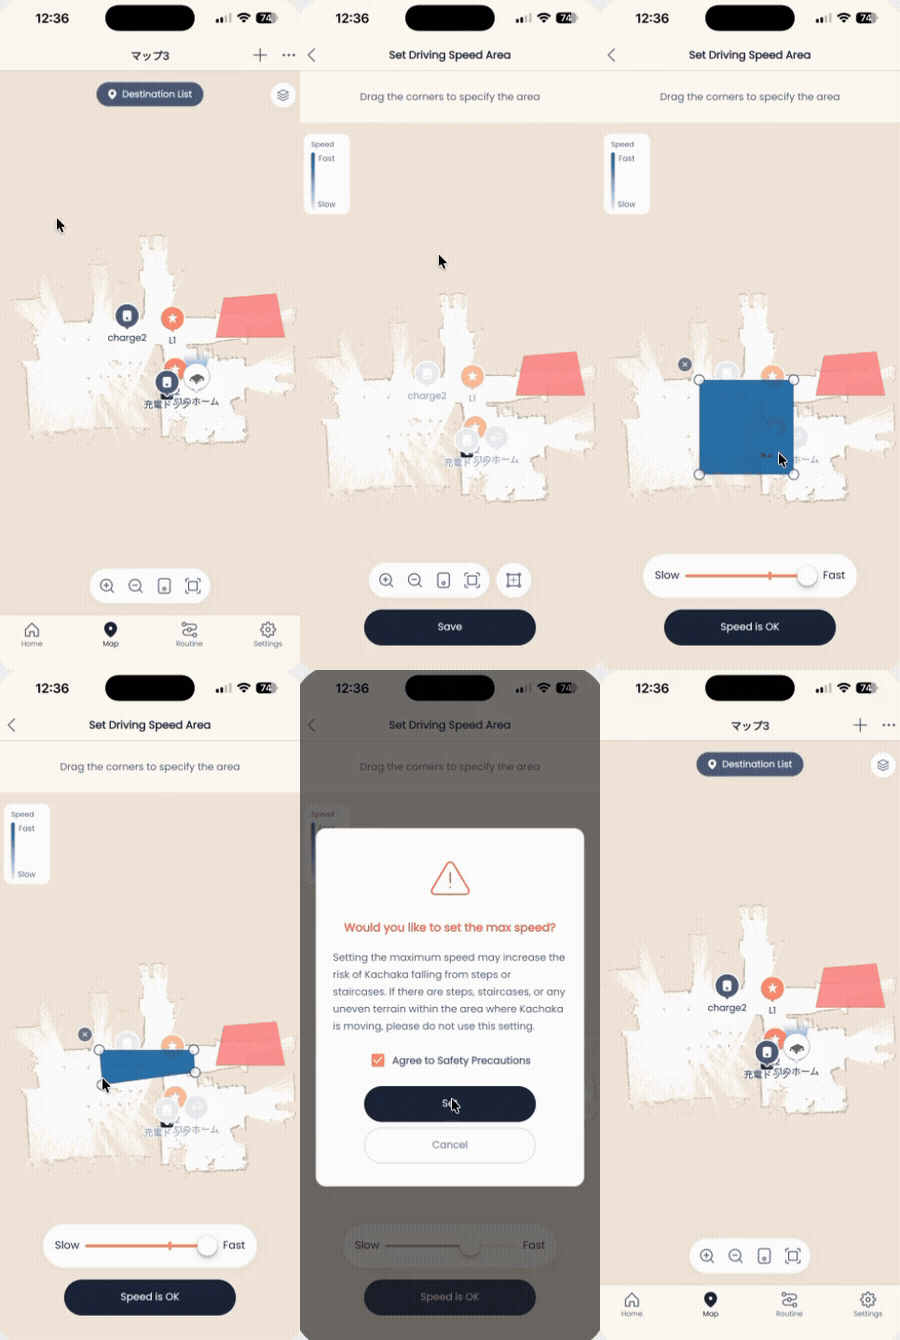
How to set a speed zone
- Open the app and go to the “Map” tab.
- Tap the ”+” icon in the top-right corner.
- Choose “Set speed zone” from the menu.
- Tap the plus icon in the bottom-right corner to add a zone.
- Drag the blue outline to enclose the area you want to control. The shape is fully adjustable, so match it to your floor layout — for example along a corridor corner or in front of a counter.
- Drag the “movement speed” slider to set the speed for this zone.
- Collapse the speed panel downward, or tap an empty spot on the map, to return to the map view.
- Tap “OK” to save.
To add another zone, repeat steps 4–8.
Combining with other features
A speed zone only slows down or speeds up Kachaka within a defined area. If your actual need is different, use the matching feature instead:
- To change Kachaka’s overall travel speed (not per-zone), see Adjusting Movement Speed.
- To keep Kachaka out of an area entirely, set a no-go zone instead — see No-Go Zones and Enterable Areas.
- To fix a specific travel route and stop Kachaka from taking shortcuts, see Setting Driving Routes (Kachaka Pro).
- For ramps that need special handling, see Setting Slope Zones (Kachaka Pro).
- To make Kachaka more or less willing to squeeze through narrow gaps, see Adjust Movement Caution Level.
Speed zones are tied to the map. If you later create a new map, you will need to outline the zones again on that map.
Screens