
Routine Automation: Triggers and Multi-Action Setup
A Routine is Kachaka’s core automation tool: you set a trigger, then specify the action to run when that trigger fires. After that, whenever the condition is met, Kachaka does the job automatically — no need to operate it by hand or give a voice command every time.
Available Triggers and Actions
A Routine is made of “trigger + action.”
Triggers you can choose from:
- Time: Run automatically at a fixed daily or weekly time (for example, every day at 12:00). If what you want is timed delivery, see Scheduled Delivery: Set Up and Edit Time Triggers.
- Voice command: Trigger with a short spoken phrase, such as “ねぇカチャカ、配膳して”. For voice trigger keywords and setup, see Voice Shortcuts and Routine Voice Keywords.
- Multi-function button: Press the multi-function button on the back of the robot to trigger.
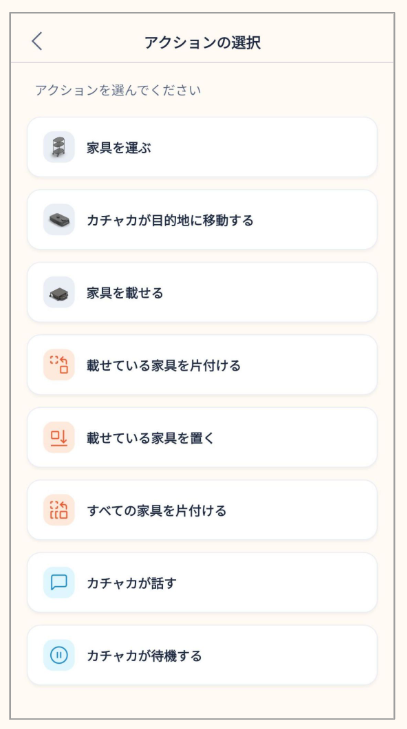
Actions include: carry a specified piece of furniture to a destination, return to the charging dock (go home), have Kachaka speak a phrase out loud (for example, read a message on arrival), and more.
Version Requirements
Routines require the app and robot software to be at certain versions:
- Kachaka App: v2.4 or later
- Robot software: v2.2 or later
To check versions, see Checking Your App and Robot Software Versions; to update, see Updating the Robot’s Software.
Create a Routine (Basic Flow)
Example: “Press the multi-function button to send the serving cart back to Home.”
-
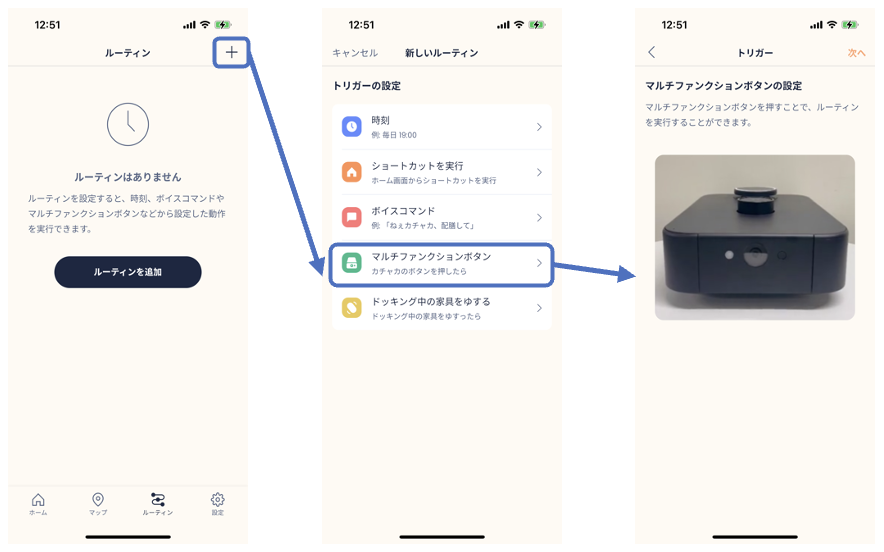
Open the app, switch to the “Routine” tab, and tap the ”+” in the top-right corner to add a new Routine.
-
Choose a trigger — here, select “Multi-function button,” then tap “Next.”
-
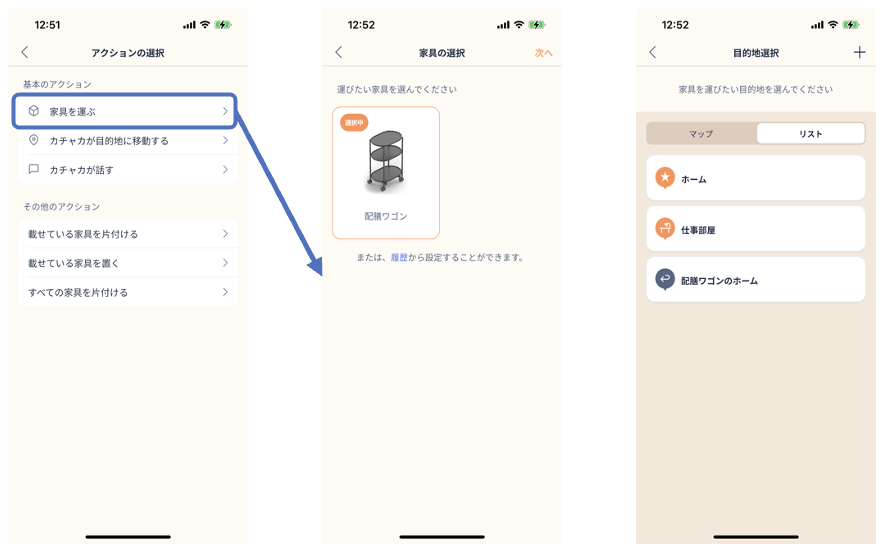
Under action selection, choose “Carry furniture.”
-
Select the furniture to carry (for example, the serving cart), then tap Next to proceed to destination selection.
-
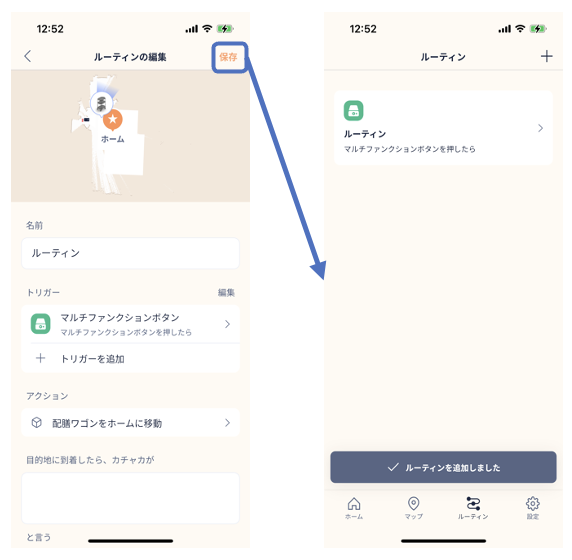
From the destination list, choose “Home” to enter the Routine edit screen.
-
Once everything looks right, tap “Save” to finish creating the Routine.
After this, pressing the multi-function button on the back of the robot makes Kachaka automatically send the serving cart back to Home.
Furniture and destinations must already be registered to appear here. For furniture registration, see Registering Furniture and Adding Aliases; for basic moving, see Moving Furniture: Basics.
The screen layout differs slightly across software versions (a new layout arrived in v3.11), but the steps are the same — just follow the order above.
Kachaka Pro: Chaining Multiple Actions in One Routine
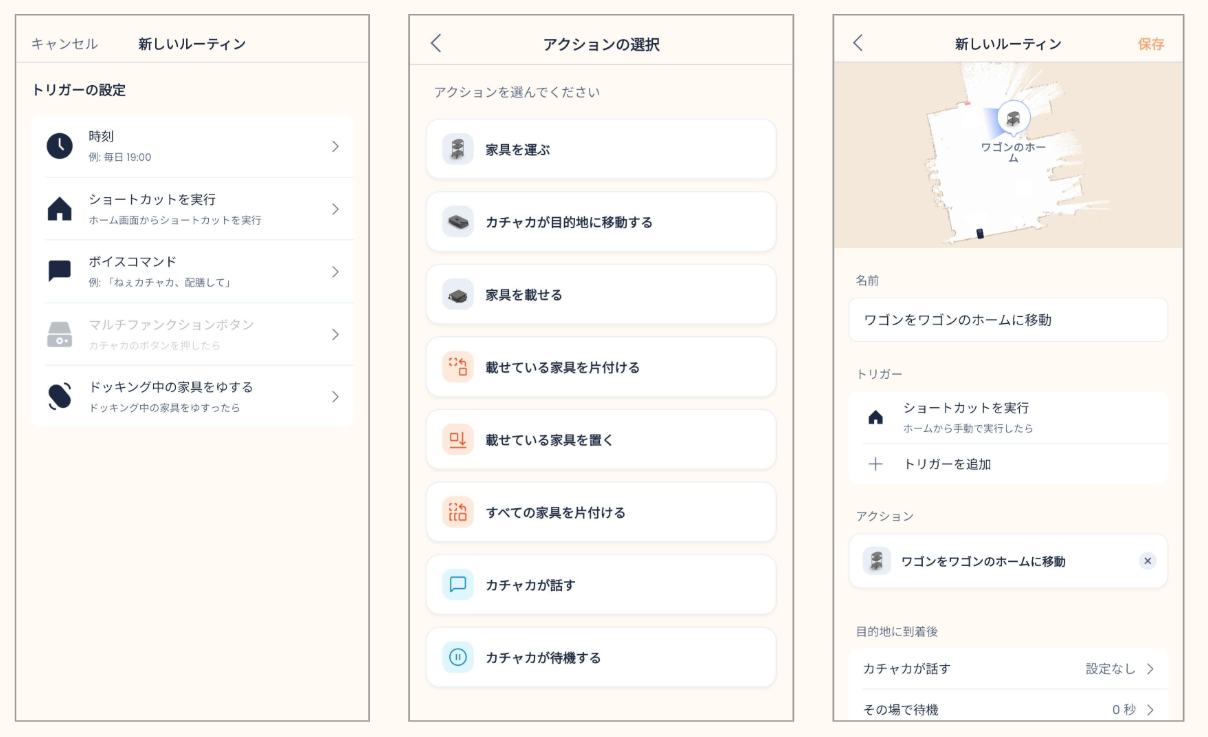
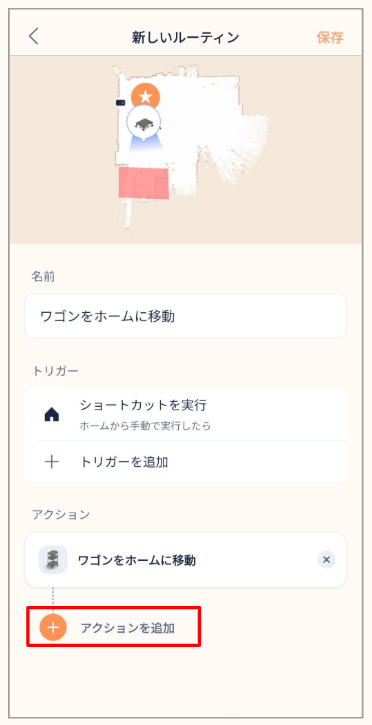
Kachaka Pro can register multiple actions within a single Routine, achieving “one trigger, several tasks run in sequence” or “move to several destinations in one instruction.” The standard consumer model does not support this advanced setup.
How to set it up:
- Open the “Routine” tab and tap the ”+” in the top-right corner.
- Choose a trigger.
- Select the first action.
- Tap ”+ Add action” at the bottom of the screen.
- Select the second action.
- To chain more actions, repeat steps 4–5.
- When everything is arranged, tap “Save” in the top-right corner.
This way, one trigger lets the Pro complete several deliveries in a row, or tour multiple points in order.
Note: Under Remote Control (operating away from the same Wi-Fi), Routines that contain multiple actions cannot be shown or executed. Run these Routines while on the same network as Kachaka.
Screens
Related
- Scheduled Delivery: Set Up and Edit Time Triggers
- Shortcuts: One-Tap Commands
- Queue and Repeated or Multiple Tasks
- Voice Shortcuts and Routine Voice Keywords
- Remote Control: Operate Away From Home Wi-Fi
- Updating the Robot’s Software